
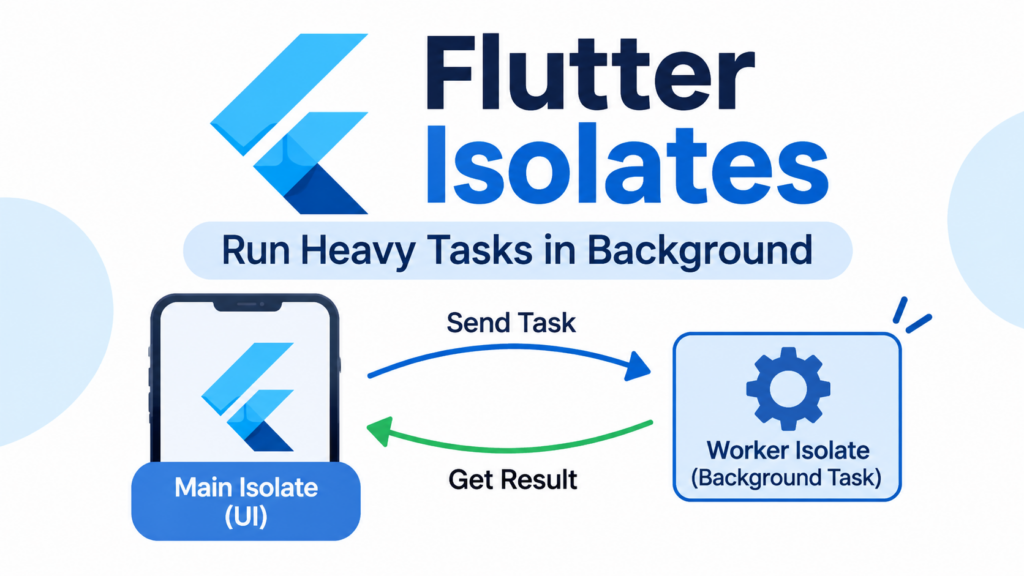
When building Flutter applications, performance is one of the most important things to consider. Users expect applications to open quickly, respond smoothly, and handle data without freezing the screen.
However, sometimes an application needs to perform heavy operations such as parsing large JSON responses, processing images, filtering thousands of records, or performing complex calculations. If these operations run on the main isolate, they can make the user interface slow or unresponsive.
This is where Flutter Isolates become useful.
Dart provides isolates to execute CPU-intensive tasks independently from the main isolate. They help developers perform expensive computations without blocking the user interface.
In this tutorial, you will learn what isolates are, how they work, how to use Isolate.run(), how to use Flutter’s compute() function, and how to communicate between multiple isolates using SendPort and ReceivePort.
1. What Are Isolates in Flutter?
An isolate is an independent execution environment in Dart. Every isolate has its own memory and event loop.
Unlike traditional threads that can share memory, Dart isolates do not share mutable state. They communicate with each other by sending messages.
By default, a Flutter application runs its UI-related work on the main isolate. This isolate handles tasks such as:
- Processing user interactions.
- Building and updating widgets.
- Handling application events.
- Rendering frames.
- Running normal application logic.
When a heavy computation runs on the main isolate, it can prevent the application from processing UI events on time.
A worker isolate allows you to move that computation away from the main isolate.
Simple example
Imagine your application downloads a large JSON file containing 50,000 user records.
The application needs to decode the JSON and convert it into Dart objects.
If the decoding operation takes too long on the main isolate, the screen may freeze temporarily.
Instead, you can move the JSON parsing operation to another isolate. The main isolate remains available to handle UI updates while the worker isolate processes the data.
2. Why Do We Need Isolates in Flutter?
Flutter applications frequently perform operations that require significant CPU processing.
Some examples include:
- Parsing large JSON responses.
- Processing or compressing images.
- Performing complex mathematical calculations.
- Filtering large collections of records.
- Reading and processing large files.
- Converting audio or video data.
- Processing large datasets.
Consider the following example:
void processLargeData() {
  int total = 0;

  for (int i = 0; i < 1000000000; i++) {
    total += i;
  }

  print(total);
}
This function performs a large number of calculations.
If you call it directly from a button’s onPressed callback, it can block the main isolate until the calculation finishes.
ElevatedButton(
  onPressed: () {
    processLargeData();
  },
  child: const Text('Calculate'),
)
During that time, the UI may become unresponsive.
Using an isolate allows the calculation to run independently.
Important: You don’t need isolates for every asynchronous operation. Network requests and many file operations already have asynchronous APIs. Isolates are particularly useful when CPU-heavy synchronous work causes UI jank.
3. Main Isolate vs Worker Isolate
Dart applications can use multiple isolates to perform independent tasks.
Let’s understand the difference between the main isolate and a worker isolate.
Main Isolate
The main isolate is responsible for the application’s primary execution and Flutter UI.
Its responsibilities include:
- Managing widget updates.
- Handling user interactions.
- Processing UI events.
- Updating application state.
- Coordinating screen rendering.
Worker Isolate
A worker isolate performs computational tasks independently.
Its responsibilities may include:
- Parsing large JSON data.
- Performing calculations.
- Processing files.
- Filtering large datasets.
- Preparing data for the UI.
Main Isolate vs Worker Isolate
| Main Isolate | Worker Isolate |
|---|---|
| Handles Flutter UI | Handles background computation |
| Processes user interactions | Processes independent tasks |
| Builds and updates widgets | Cannot directly update widgets |
| Can become blocked by heavy CPU work | Keeps heavy work away from the UI |
| Uses its own memory | Has separate memory |
Remember that a worker isolate cannot directly access the main isolate’s variables or update Flutter widgets. It must return results through message passing.
4. How Do Flutter Isolates Work?
Dart isolates follow a message-passing model.
Each isolate has its own memory, so one isolate cannot directly modify another isolate’s variables.
For communication, Dart provides two important classes:
SendPort: Used to send messages.ReceivePort: Used to receive messages.
The basic process looks like this:
- The main isolate creates a worker isolate.
- The main isolate sends data to the worker.
- The worker performs the requested computation.
- The worker sends the result back.
- The main isolate receives the result and updates the UI.
This approach avoids shared mutable state and makes concurrent programming easier to manage.
5. Create an Isolate Using Isolate.run()
Dart provides Isolate.run() to execute a one-time computation in a separate isolate.
It is one of the simplest ways to perform CPU-intensive work outside the main isolate.
First, import the Dart isolate library:
import 'dart:isolate';Now create a function that performs a heavy calculation.
int calculateTotal() {
  int total = 0;

  for (int i = 0; i < 100000000; i++) {
    total += i;
  }

  return total;
}
You can execute this function using Isolate.run():
Future<void> performCalculation() async {
  final result = await Isolate.run(() {
    return calculateTotal();
  });

  print('Result: $result');
}
Here is what happens:
Isolate.run()starts a new isolate.- The calculation runs inside that isolate.
- The result is returned to the calling isolate.
- The temporary isolate shuts down after the computation finishes.
Because the calculation runs independently, it does not block the main isolate.
Using Isolate.run() in a Flutter button
You can call the function from a Flutter widget:
ElevatedButton(
  onPressed: () async {
    final result = await Isolate.run(() {
      int total = 0;

      for (int i = 0; i < 100000000; i++) {
        total += i;
      }

      return total;
    });

    print('Calculation Result: $result');
  },
  child: const Text('Calculate'),
)
For production applications, it is better to keep heavy computation in a separate function instead of writing complex logic directly inside the button callback.
Note: Values captured by the callback and the returned result must be transferable between isolates. Avoid capturing objects such as open sockets, controllers, or other resources that cannot be sent between isolates.
6. Using compute() in Flutter
Flutter provides a convenient function called compute() from the flutter/foundation.dart package.
It is useful when you want to execute a function with an input value and receive its result.
Import the required package:
import 'package:flutter/foundation.dart';The basic syntax is:
final result = await compute(functionName, inputData);Here:
functionNameis the function that performs the computation.inputDatais the value passed to that function.resultcontains the returned value.
Let’s understand this with an example.
Step 1: Create a background function
int calculateSquare(int number) {
  return number * number;
}
Step 2: Call compute()
Future<void> calculateResult() async {
  final result = await compute(calculateSquare, 10);

  print(result);
}
Output:
100The compute() function runs the computation using an isolate on native platforms such as Android and iOS.
On Flutter web, it runs the computation on the current event loop instead of creating a separate isolate.
Important: Keep the callback and its input/output values compatible with isolate message passing. A top-level or static function is a good choice for the callback.
7. Parse Large JSON Data Using Flutter Isolates
One of the most practical use cases of Flutter Isolates is parsing large JSON responses.
Imagine your application receives thousands of user records from an API.
You can fetch the response asynchronously and move the expensive JSON decoding work to another isolate.
For this example, install the HTTP package:
flutter pub add httpStep 1: Import packages
import 'dart:convert';

import 'package:flutter/foundation.dart';
import 'package:http/http.dart' as http;
Step 2: Create a JSON parsing function
Create a top-level function that converts the JSON response into a list of maps.
List<Map<String, dynamic>> parseUsers(String responseBody) {
  final decoded = jsonDecode(responseBody) as List<dynamic>;

  return decoded.map((item) {
    return Map<String, dynamic>.from(item as Map);
  }).toList();
}
This function decodes the JSON and converts each record into a Dart map.
Step 3: Fetch data and use compute()
Future<void> fetchUsers() async {
  final url = Uri.parse(
    'https://jsonplaceholder.typicode.com/users',
  );

  final response = await http.get(url);

  if (response.statusCode == 200) {
    final users = await compute(parseUsers, response.body);

    print(users);
  } else {
    throw Exception('Failed to load users');
  }
}
How does this work?
First, the HTTP request downloads the response.
Next, compute() sends the response body to the parsing function.
The JSON decoding and conversion happen in a separate isolate on native platforms. Finally, the parsed data is returned to the main isolate.
This is especially useful when working with large responses that take noticeable time to decode.
Remember: The network request itself is already asynchronous. The isolate is used for CPU-intensive JSON parsing, not simply for waiting for the API response.
8. Use Isolates for Heavy Calculations
Another common use case is performing complex mathematical calculations.
For example, consider an application that needs to calculate the sum of a large range of numbers.
You can use Isolate.run():
import 'dart:isolate';

Future<int> calculateLargeSum() async {
  return await Isolate.run(() {
    int sum = 0;

    for (int i = 1; i <= 100000000; i++) {
      sum += i;
    }

    return sum;
  });
}
Now call it from your widget:
ElevatedButton(
  onPressed: () async {
    final result = await calculateLargeSum();

    print('Total: $result');
  },
  child: const Text('Calculate Sum'),
)
The calculation runs in a separate isolate, and the result becomes available when the operation finishes.
This approach can be useful for:
- Large mathematical calculations.
- Data transformations.
- Complex filtering operations.
- Processing large collections.
- CPU-intensive algorithms.
9. Communicate Between Isolates Using SendPort and ReceivePort
So far, we have used Isolate.run() and compute() for one-time tasks.
But what if you need a worker isolate that stays active and processes multiple messages?
For this purpose, Dart provides Isolate.spawn(), SendPort, and ReceivePort.
Let’s create a simple worker isolate.
Step 1: Import dart
import 'dart:isolate';Step 2: Create a worker function
The worker function receives a SendPort and sends a result back to the main isolate.
void heavyTask(SendPort sendPort) {
  int total = 0;

  for (int i = 0; i < 100000000; i++) {
    total += i;
  }

  sendPort.send(total);
}
Step 3: Create and start the isolate
Future<void> startWorker() async {
  final receivePort = ReceivePort();

  final isolate = await Isolate.spawn(
    heavyTask,
    receivePort.sendPort,
  );

  final result = await receivePort.first;

  print('Result: $result');

  receivePort.close();

  isolate.kill(priority: Isolate.immediate);
}
Understanding the code
Let’s understand the important parts:
ReceivePort: Creates a communication channel for receiving messages.
SendPort: Allows the worker isolate to send a message back to the main isolate.
Isolate.spawn(): Creates a new worker isolate and executes the supplied entry-point function.
receivePort.first: Waits for the first message from the worker.
isolate.kill(): Stops the worker isolate if it is still running.
This example performs one calculation and receives one result. For a real long-lived worker, you would normally keep the isolate and its ports alive, listen for multiple messages, and implement a clear shutdown process.
10. Flutter Isolates vs Async/Await
Many Flutter developers confuse isolates with asynchronous programming.
Both help with application responsiveness, but they solve different problems.
Async/Await
The async and await keywords make asynchronous operations easier to write and manage.
They are commonly used for:
- API requests.
- Database operations.
- File operations supported by asynchronous APIs.
- Waiting for futures.
- Handling asynchronous responses.
Example:
Future<void> fetchData() async {
  final response = await http.get(
    Uri.parse('https://jsonplaceholder.typicode.com/users'),
  );

  print(response.body);
}
The application can continue processing other events while waiting for the network response.
However, async and await do not automatically move CPU-heavy synchronous calculations to another isolate.
Flutter Isolates
Isolates allow CPU-intensive computations to run independently from the main isolate.
They are useful for:
- Large JSON parsing.
- Image processing.
- Complex calculations.
- Heavy data transformations.
Comparison
| Async/Await | Flutter Isolates |
|---|---|
| Manages asynchronous operations | Runs independent computations |
| Useful for network requests | Useful for CPU-heavy work |
| Does not automatically create another isolate | Uses a separate isolate on supported native platforms |
| Uses futures | Uses message passing and futures |
| Great for waiting on I/O | Great for expensive computations |
In many applications, you can use both together. For example, use await to fetch an API response and compute() to parse a large JSON response.
You can also read our tutorials on Flutter Async and Await and Flutter FutureBuilder.
11. Common Mistakes When Using Flutter Isolates
Isolates are useful, but developers can make mistakes when implementing them.
Here are some common issues to avoid.
1. Using Isolates for Small Tasks
Not every operation needs a separate isolate.
Creating an isolate has overhead, so moving a simple calculation or small JSON response to another isolate may not improve performance.
Use isolates when profiling shows that CPU-intensive work is affecting UI responsiveness.
2. Trying to Update Widgets from a Worker Isolate
A worker isolate cannot directly update Flutter widgets or use the main isolate’s widget state.
Instead, return the result to the main isolate and update the UI there.
3. Accessing Flutter UI APIs in a Worker Isolate
Flutter UI operations are associated with the main isolate.
A worker isolate should not try to build widgets, access widget state, or use UI-only APIs.
Some Flutter resources, such as rootBundle, are also unavailable in ordinary spawned isolates.
4. Sending Unsupported Objects Between Isolates
Isolates communicate through messages.
Some objects, including open sockets and certain resource handles, cannot be sent between isolates.
Prefer simple transferable values such as:
- Strings.
- Numbers.
- Booleans.
- Lists and maps containing transferable values.
- SendPort objects.
5. Creating Too Many Isolates
Creating a new isolate for every small task can increase memory usage and overhead.
For one-time operations, use Isolate.run() or compute().
For repeated work, consider maintaining a long-lived worker isolate.
6. Ignoring Errors and Cleanup
Always consider what happens if an isolate fails or a computation throws an exception.
For long-lived workers, close ports and stop isolates when they are no longer needed.
12. Best Practices for Flutter Isolates
Follow these practices when using isolates in production applications:
- Use isolates for CPU-intensive work: Move expensive computations away from the main isolate when they cause UI jank.
- Prefer Isolate.run() for one-time tasks: It provides a simple way to execute a computation in another isolate.
- Use compute() for simple Flutter background tasks: It is convenient for passing one input to a function and receiving a result.
- Use Isolate.spawn() for long-running workers: It is useful when the same worker needs to process multiple messages.
- Keep messages simple: Send only the data the worker needs.
- Avoid unnecessary data copying: Large messages can add memory and processing overhead. Consider whether the data can be reduced or transferred efficiently.
- Keep UI updates on the main isolate: Return processed data and update widgets from the main isolate.
- Handle errors properly: Use error handling and appropriate cleanup for worker isolates.
- Profile your application: Use Flutter DevTools to identify actual performance bottlenecks before introducing isolates.
- Consider platform differences: Dart isolates are not supported on Flutter web in the same way as native platforms. The
compute()function runs on the current event loop on web.
13. Frequently Asked Questions (FAQs)
What are Flutter Isolates?
Flutter Isolates are independent execution environments provided by Dart. They have separate memory and event loops and communicate through message passing. They help run CPU-intensive tasks without blocking the main UI isolate.
Why should we use isolates in Flutter?
You should use isolates when heavy computations affect application performance. Common examples include parsing large JSON responses, processing images, filtering large datasets, and performing complex calculations.
What is the difference between Isolate.run() and compute()?
Isolate.run() is a Dart API for executing a one-time computation in a new isolate. compute() is a Flutter convenience function that accepts a callback and a message. On native platforms, compute() uses an isolate; on web, it runs on the current event loop.
Does async/await create a new isolate?
No. The async and await keywords manage asynchronous operations using futures. They do not automatically move CPU-intensive synchronous work to another isolate.
Can isolates share variables in Dart?
No. Isolates have separate memory and do not share mutable state. They communicate by sending messages through ports.
Can we use isolates in Flutter web?
Dart web platforms do not support isolates in the same way as native platforms. Flutter’s compute() function is available, but it executes the computation on the current event loop on web rather than creating a separate isolate.
Can we use Flutter plugins inside an isolate?
Plugin support in worker isolates has limitations. Some platform-channel operations can be configured in background isolates, but not every plugin supports them. Always check the plugin’s documentation before using it outside the main isolate.
Is Isolate.run() better than Isolate.spawn()?
Neither is universally better. Isolate.run() is simpler for one-time computations because the isolate automatically exits after returning its result. Isolate.spawn() is more suitable for long-lived workers that need to process multiple messages.
Conclusion
Flutter Isolates are an important feature of Dart that helps developers build responsive and performant applications.
When an application performs CPU-intensive operations on the main isolate, it can cause UI jank and make the application feel slow. By moving those computations to worker isolates, you can keep the main isolate available for UI-related work.
For one-time computations, Isolate.run() and Flutter’s compute() function are convenient choices. For long-running background workers that need to communicate repeatedly, Isolate.spawn(), SendPort, and ReceivePort provide more control.
Start by identifying performance bottlenecks in your application, then use isolates where they provide a meaningful improvement.
With a good understanding of Flutter Isolates, you can handle large datasets, complex calculations, and other expensive operations more efficiently.