
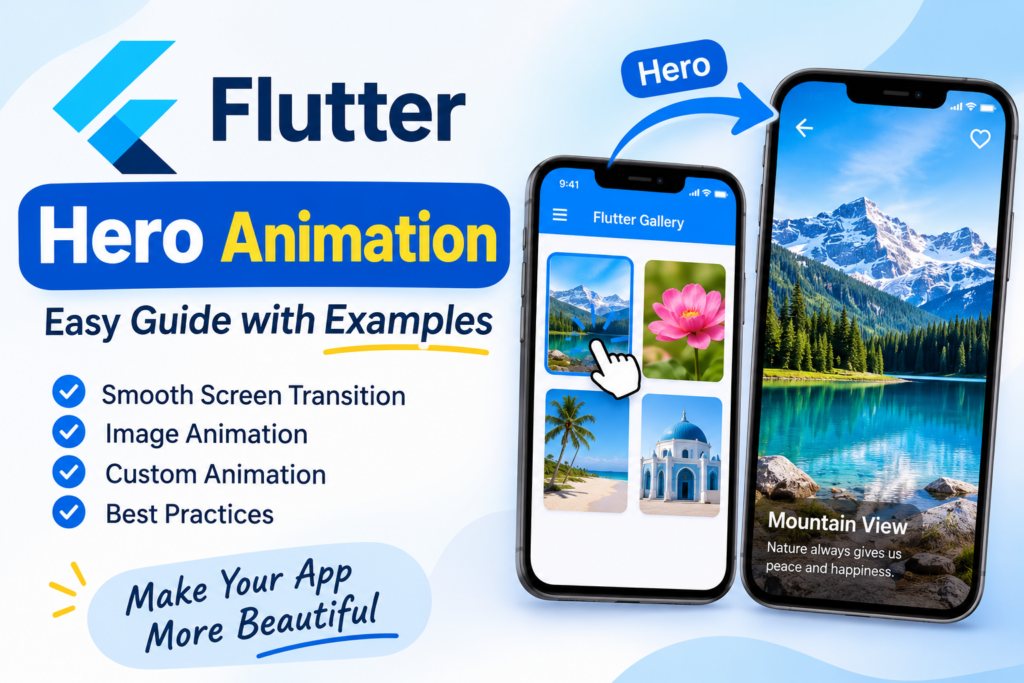
Have you ever noticed how an image smoothly moves from a small card to a full-screen view when you tap it in a mobile application? This type of smooth transition makes an application feel more interactive and professional.
Flutter provides a built-in widget called Hero that makes these animations easy to implement.
In this tutorial, you’ll learn Flutter Hero Animation step by step. We’ll create a basic Hero animation, animate images between two screens, build a product details example, customize animation duration, and understand common mistakes.
No external animation package is required.
What Is Hero Animation in Flutter?
Hero Animation is a built-in Flutter animation that creates a visual transition between two screens.
It works by identifying a widget on the first screen and matching it with another widget on the second screen using a unique tag.
When you navigate between the screens, Flutter automatically animates the matching widgets from their original position and size to their destination position and size.
For example:
- A small product image expands into a larger image on the product details screen.
- A profile picture moves from a user list to a profile page.
- A thumbnail image expands into a full-screen image.
- A card image smoothly transitions into a detail view.
The Hero widget is especially useful when you want to create natural and smooth navigation experiences.
How Does Hero Animation Work?
Flutter Hero Animation mainly depends on two things:
- A
Herowidget on the first screen. - Another
Herowidget on the destination screen with the same tag.
For example:
Hero(
  tag: 'profile-image',
  child: Image.network(
    'https://example.com/profile.jpg',
  ),
)
On the second screen, use the same tag:
Hero(
  tag: 'profile-image',
  child: Image.network(
    'https://example.com/profile.jpg',
  ),
)
When you navigate between these screens, Flutter finds the matching Hero widgets and animates the transition.
Important: The Hero tags must match exactly. The source and destination widgets must also be present in the appropriate routes when the transition happens.
Step 1: Create a Basic Hero Animation
Let’s start with a simple example.
We’ll create two screens:
- Home Screen: Displays a small image.
- Detail Screen: Displays the same image in a larger size.
When the user taps the image, it will smoothly expand on the next screen.
Create a new Flutter project:
flutter create hero_animation_demo
cd hero_animation_demo
Open lib/main.dart and add the following code:
import 'package:flutter/material.dart';

void main() {
  runApp(const MyApp());
}

class MyApp extends StatelessWidget {
  const MyApp({super.key});

  @override
  Widget build(BuildContext context) {
    return MaterialApp(
      debugShowCheckedModeBanner: false,
      home: const HomeScreen(),
    );
  }
}

class HomeScreen extends StatelessWidget {
  const HomeScreen({super.key});

  final String imageUrl =
      'https://picsum.photos/id/1011/600/600';

  @override
  Widget build(BuildContext context) {
    return Scaffold(
      appBar: AppBar(
        title: const Text('Hero Animation Demo'),
      ),
      body: Center(
        child: GestureDetector(
          onTap: () {
            Navigator.push(
              context,
              MaterialPageRoute(
                builder: (context) => DetailScreen(
                  imageUrl: imageUrl,
                ),
              ),
            );
          },
          child: Hero(
            tag: 'hero-image',
            child: ClipRRect(
              borderRadius: BorderRadius.circular(16),
              child: Image.network(
                imageUrl,
                width: 150,
                height: 150,
                fit: BoxFit.cover,
              ),
            ),
          ),
        ),
      ),
    );
  }
}

class DetailScreen extends StatelessWidget {
  final String imageUrl;

  const DetailScreen({
    super.key,
    required this.imageUrl,
  });

  @override
  Widget build(BuildContext context) {
    return Scaffold(
      appBar: AppBar(
        title: const Text('Image Details'),
      ),
      body: Center(
        child: Hero(
          tag: 'hero-image',
          child: ClipRRect(
            borderRadius: BorderRadius.circular(16),
            child: Image.network(
              imageUrl,
              width: 320,
              height: 320,
              fit: BoxFit.cover,
            ),
          ),
        ),
      ),
    );
  }
}
Run the application:
flutter runUnderstanding the code
Let’s understand the important parts of this example.
1. Create the Hero widget
Hero(
  tag: 'hero-image',
  child: Image.network(
    imageUrl,
    width: 150,
    height: 150,
  ),
)
The Hero widget wraps the image that we want to animate.
The tag property identifies the widget during navigation.
2. Navigate to the next screen
Navigator.push(
  context,
  MaterialPageRoute(
    builder: (context) => DetailScreen(
      imageUrl: imageUrl,
    ),
  ),
);
When the user taps the image, Flutter navigates to the detail screen.
3. Use the same Hero tag
Hero(
  tag: 'hero-image',
  child: Image.network(
    imageUrl,
    width: 320,
    height: 320,
  ),
)
The destination screen uses the same hero-image tag.
Flutter matches both widgets and automatically animates the image between their positions and sizes.
The animation also runs in reverse when the user navigates back.
Step 2: Create a Flutter Hero Animation for a Product Details Screen
Hero Animation is especially useful in e-commerce applications.
Imagine a product listing screen containing multiple products. When users tap a product image, the image smoothly expands into the product details screen.
Let’s create a simple product example.
import 'package:flutter/material.dart';

class Product {
  final int id;
  final String name;
  final String image;
  final double price;

  const Product({
    required this.id,
    required this.name,
    required this.image,
    required this.price,
  });
}

const List<Product> products = [
  Product(
    id: 1,
    name: 'Headphones',
    image: 'https://picsum.photos/id/180/600/600',
    price: 1999,
  ),
  Product(
    id: 2,
    name: 'Camera',
    image: 'https://picsum.photos/id/250/600/600',
    price: 4999,
  ),
];

class ProductListScreen extends StatelessWidget {
  const ProductListScreen({super.key});

  @override
  Widget build(BuildContext context) {
    return Scaffold(
      appBar: AppBar(
        title: const Text('Our Products'),
      ),
      body: ListView.builder(
        padding: const EdgeInsets.all(16),
        itemCount: products.length,
        itemBuilder: (context, index) {
          final product = products[index];

          return Card(
            margin: const EdgeInsets.only(bottom: 16),
            child: ListTile(
              contentPadding: const EdgeInsets.all(12),
              leading: Hero(
                tag: 'product-${product.id}',
                child: ClipRRect(
                  borderRadius: BorderRadius.circular(8),
                  child: Image.network(
                    product.image,
                    width: 70,
                    height: 70,
                    fit: BoxFit.cover,
                  ),
                ),
              ),
              title: Text(product.name),
              subtitle: Text('₹${product.price}'),
              onTap: () {
                Navigator.push(
                  context,
                  MaterialPageRoute(
                    builder: (context) =>
                        ProductDetailsScreen(product: product),
                  ),
                );
              },
            ),
          );
        },
      ),
    );
  }
}

class ProductDetailsScreen extends StatelessWidget {
  final Product product;

  const ProductDetailsScreen({
    super.key,
    required this.product,
  });

  @override
  Widget build(BuildContext context) {
    return Scaffold(
      appBar: AppBar(
        title: Text(product.name),
      ),
      body: Padding(
        padding: const EdgeInsets.all(20),
        child: Column(
          crossAxisAlignment: CrossAxisAlignment.start,
          children: [
            Center(
              child: Hero(
                tag: 'product-${product.id}',
                child: ClipRRect(
                  borderRadius: BorderRadius.circular(16),
                  child: Image.network(
                    product.image,
                    width: 300,
                    height: 300,
                    fit: BoxFit.cover,
                  ),
                ),
              ),
            ),
            const SizedBox(height: 24),
            Text(
              product.name,
              style: const TextStyle(
                fontSize: 24,
                fontWeight: FontWeight.bold,
              ),
            ),
            const SizedBox(height: 12),
            Text(
              'Price: ₹${product.price}',
              style: const TextStyle(
                fontSize: 20,
                color: Colors.green,
              ),
            ),
            const SizedBox(height: 20),
            const Text(
              'Explore this product and enjoy a smooth shopping experience.',
              style: TextStyle(fontSize: 16),
            ),
          ],
        ),
      ),
    );
  }
}
What makes this example different?
In this example, we have multiple products.
Each product has a unique ID, so we use that ID to generate a unique Hero tag:
tag: 'product-${product.id}'For example:
- Product 1 uses
product-1. - Product 2 uses
product-2.
This prevents Hero tag conflicts when navigating from a product list to its detail screen.
The same tag is used on the corresponding product details screen.
This pattern is useful for shopping apps, image galleries, and other applications with multiple animated items.
Step 3: Customize Hero Animation Duration
By default, Flutter uses the route transition animation to control the Hero transition.
You can customize the route transition duration using PageRouteBuilder.
For example:
Navigator.push(
  context,
  PageRouteBuilder(
    transitionDuration: const Duration(
      milliseconds: 1000,
    ),
    reverseTransitionDuration: const Duration(
      milliseconds: 700,
    ),
    pageBuilder: (
      context,
      animation,
      secondaryAnimation,
    ) {
      return const DetailScreen(
        imageUrl: 'https://picsum.photos/id/1011/600/600',
      );
    },
    transitionsBuilder: (
      context,
      animation,
      secondaryAnimation,
      child,
    ) {
      return FadeTransition(
        opacity: animation,
        child: child,
      );
    },
  ),
);
Here:
transitionDurationcontrols how long the forward route transition takes.reverseTransitionDurationcontrols the duration when navigating back.FadeTransitionadds a fade effect to the destination screen.
The Hero widget participates in the route transition, so changing the route duration also affects the Hero flight.
You can experiment with different durations to create the desired effect.
Step 4: Customize the Hero Animation Using flightShuttleBuilder
Flutter also allows you to customize the widget displayed while a Hero is moving between screens.
You can use the flightShuttleBuilder property for this purpose.
Example:
Hero(
  tag: 'custom-hero',
  flightShuttleBuilder: (
    flightContext,
    animation,
    direction,
    fromContext,
    toContext,
  ) {
    return Material(
      color: Colors.transparent,
      child: ScaleTransition(
        scale: animation.drive(
          Tween<double>(
            begin: 0.8,
            end: 1.0,
          ),
        ),
        child: Image.network(
          'https://picsum.photos/id/1011/600/600',
          fit: BoxFit.cover,
        ),
      ),
    );
  },
  child: Image.network(
    'https://picsum.photos/id/1011/600/600',
    width: 150,
    height: 150,
    fit: BoxFit.cover,
  ),
)
The flightShuttleBuilder lets you customize the widget that flies between the two routes.
In this example, a scale transition is applied to the image during the Hero flight.
For a fully customized Hero transition, you can also explore properties such as createRectTween and placeholderBuilder in the official Flutter documentation.
Step 5: Use Hero Animation with Profile Pictures
Another common use case is profile picture animation.
For example, a small profile picture in a user list can expand into a larger profile image on the next screen.
On the first screen:
Hero(
  tag: 'user-profile-101',
  child: CircleAvatar(
    radius: 30,
    backgroundImage: NetworkImage(
      'https://picsum.photos/id/64/300/300',
    ),
  ),
)
On the profile screen:
Hero(
  tag: 'user-profile-101',
  child: CircleAvatar(
    radius: 100,
    backgroundImage: NetworkImage(
      'https://picsum.photos/id/64/300/300',
    ),
  ),
)
Both widgets use the same tag.
When the user opens the profile screen, Flutter animates the profile image from the smaller circle to the larger circle.
This creates a smooth and natural profile navigation experience.
Common Mistakes When Using Flutter Hero Animation
Although Hero Animation is easy to implement, developers sometimes face issues during navigation.
Here are some common mistakes and their solutions.
1. Using Different Hero Tags
Both Hero widgets must use the same tag.
Incorrect:
Hero(
  tag: 'image-one',
  child: Image.network(imageUrl),
)
Destination:
Hero(
  tag: 'image-two',
  child: Image.network(imageUrl),
)
Correct:
Hero(
  tag: 'image-one',
  child: Image.network(imageUrl),
)
Use the same image-one tag on the destination screen.
2. Duplicate Hero Tags on the Same Route
If multiple Hero widgets on the same route use the same tag, Flutter may report a duplicate Hero tag error.
Incorrect:
Hero(
  tag: 'product-image',
  child: Image.network(imageUrl),
)

Hero(
  tag: 'product-image',
  child: Image.network(imageUrl),
)
Use unique tags for different items.
For example:
Hero(
  tag: 'product-1',
  child: Image.network(imageUrl),
)

Hero(
  tag: 'product-2',
  child: Image.network(imageUrl),
)
3. Forgetting to Wrap the Widget with Hero
The widget you want to animate must be a child of the Hero widget on both screens.
If the source or destination widget is missing its Hero wrapper, Flutter cannot perform the expected matching transition.
4. Using Different Images on Both Screens
For the best visual result, use the same image content on both screens.
If the source and destination use different images, the transition may look unexpected.
5. Hero Animation Not Working with Navigation
Hero animations work with Flutter route transitions.
Make sure you are navigating to another route using a supported Navigator transition and that the matching Hero widgets exist on both routes.
Best Practices for Flutter Hero Animation
Follow these tips when implementing Hero animations in your application:
- Use unique tags: Give each animated item a unique tag on its route.
- Keep matching content: Use the same visual content on both screens when possible.
- Use Hero only where useful: Too many animations can make an application feel distracting.
- Test reverse navigation: Check that the animation also works when returning to the previous screen.
- Use suitable image sizes: Avoid unnecessarily large images that can affect memory usage.
- Test on real devices: Check animation smoothness on different screen sizes and device performance levels.
- Customize carefully: Use
flightShuttleBuilderonly when the default transition doesn’t meet your design requirements.
Frequently Asked Questions
What is Hero Animation in Flutter?
Hero Animation is a built-in Flutter animation that smoothly transitions a widget between two screens. It uses matching Hero tags to identify the widgets on the source and destination routes.
How do I create a Hero Animation in Flutter?
Wrap a widget with the Hero widget on both screens and assign the same tag to each Hero. Then navigate between the screens using Flutter’s Navigator.
Do I need an external package for Hero Animation?
No. Flutter provides the Hero widget as part of its built-in animation and navigation system. You don’t need an external package for basic Hero animations.
Can I use Hero Animation with images?
Yes. Hero Animation works especially well with images. You can animate product images, profile pictures, gallery thumbnails, and other visual elements between screens.
Can I customize Hero Animation duration?
Yes. You can customize the route transition duration using PageRouteBuilder. The Hero transition follows the route’s animation.
Why is my Hero Animation not working?
Common reasons include mismatched Hero tags, duplicate tags on the same route, missing Hero widgets on either screen, or unsupported navigation transitions.
Can I use multiple Hero widgets on one screen?
Yes. You can use multiple Hero widgets on the same screen, but each must have a unique tag within that route.
What is the difference between Hero and AnimatedContainer?
Hero animates a matching widget between different routes. AnimatedContainer animates changes to properties such as width, height, padding, color, and decoration within a widget’s layout.
Conclusion
Flutter Hero Animation is a simple but powerful feature for creating smooth screen transitions.
In this tutorial, you learned how the Hero widget works, how to animate images between screens, how to build a product details transition, and how to customize animation duration and flight behavior.
Hero animations can make your application feel more interactive without requiring complex animation code or third-party packages.
Start with a simple image transition, then try using Hero animations in product listings, profile screens, and image galleries.
For more information, explore the official Flutter Hero Animation documentation and Flutter Animation documentation.