In this tutorial we will learn how to create a FlatList in React Native projects. There are several ways to create ListView in React Native like SectionList and FlatList. But in this tutorial we will learn how to create a FlatList only.
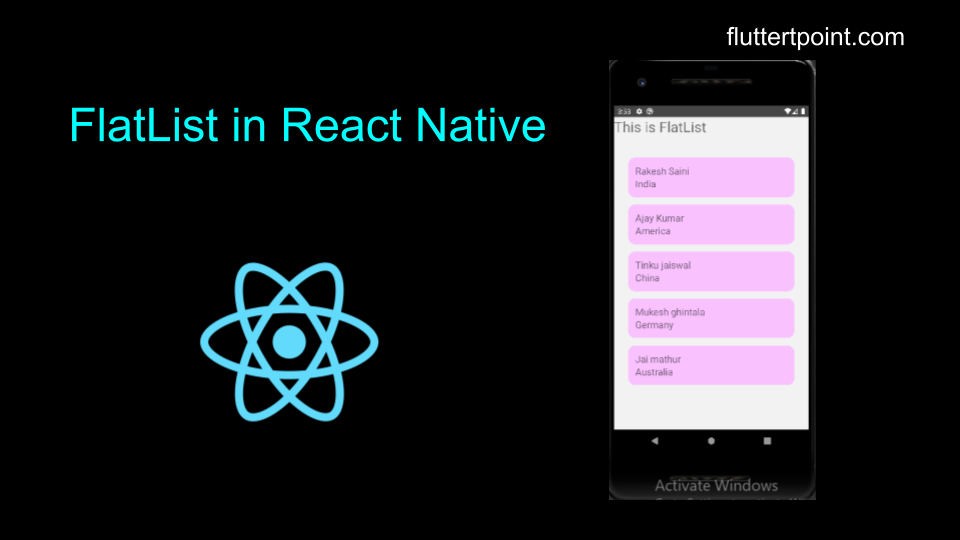
What is FlatList In React Native?
FlatList is used to show the same data multiple times in the same design from the list of data in React Native projects. Generally List or ArrayList is used to store the data in key value format. It mainly takes two props. One is data and another is renderItem.
Features Of FlatList
A performant interface of FlatList are below. Some of the most handy support features.
- Fully cross-platform
- Header support
- Footer support
- Separator support
- Pull tp refresh
- Scroll loading
- Optional horizontal mode
- Multiple column support
FlatList Example In React Native
FlatList takes two props, First one is data and another one is renderItem. In the data we provide the list of data and in renderItem we will create a single design which will repeat according to the length of data list.
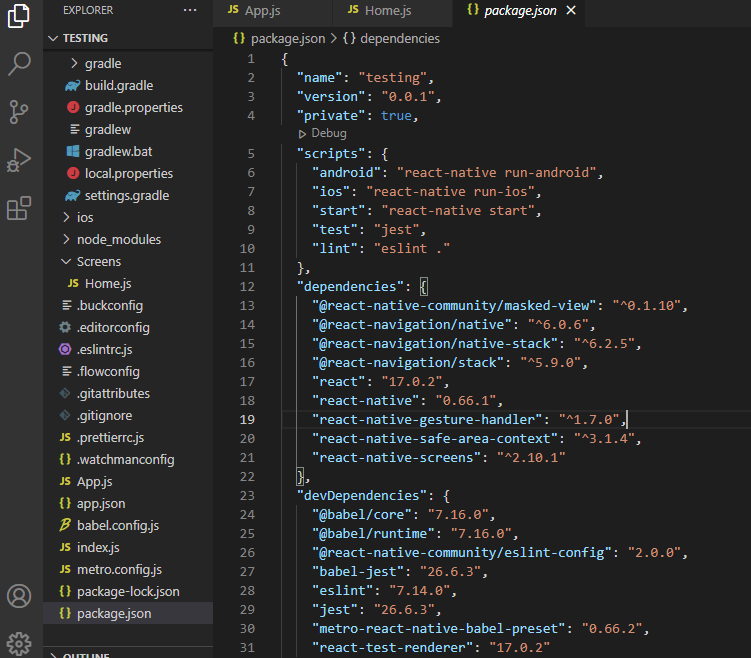
First Of All Install The Below dependencies using terminal :
npm i @react-navigation/native-stacknpm i @react-navigation/stacknpm i react-native-gesture-handlerIf you already have these then no need to install again. You can check these in your Package.json file. After installing your package.json will look like this.
Package.json File
Home.js
import React, { Component } from "react";
import { View, Text, StyleSheet, Image } from "react-native";
import { FlatList } from "react-native-gesture-handler";
import { SafeAreaView } from "react-native-safe-area-context";
import { Colors } from "react-native/Libraries/NewAppScreen";

export default class Home extends React.Component {
    constructor() {
        super();
        this.state = {
            counter: 0,
            list: [
                { "name": "Rakesh Saini", "country": "India" },
                { "name": "Ajay Kumar", "country": "America" },
                { "name": "Tinku jaiswal", "country": "China" },
                { "name": "Mukesh ghintala", "country": "Germany" },
                { "name": "Jai mathur", "country": "Australia" },
            ],
        };
    }

    setState
    render() {
        return (
            <SafeAreaView>
                <View>
                    <Text style={{ fontSize: 30 }}>This is FlatList</Text>
                    <FlatList
                        style={styles.flatList}
                        data={this.state.list}
                        renderItem={({ item }) =>
                            <View style={styles.container}>
                                    <Text style={styles.titleText}>{item.name}</Text>
                                <Text style={styles.titleText}>{item.country}</Text>
                            </View>
                        }


                        ItemSeparatorComponent={this.renderSeparator} />
                </View>
            </SafeAreaView>

        );
    }
}

const styles = StyleSheet.create({
    container: {
        // flexDirection: 'row',
        backgroundColor: '#f9c2ff',
        padding: 15,
        marginTop: 15,
        borderRadius: 15
    },

    flatList: {
        margin: 10,
        padding: 20,
    },

    titleText: {
        fontSize: 20,
    },

})
You can copy and paste the above code in your project. I created a static list to show in this project. Following is the list of data which is fixed. You can use this list to store the data to fetch from server using API.
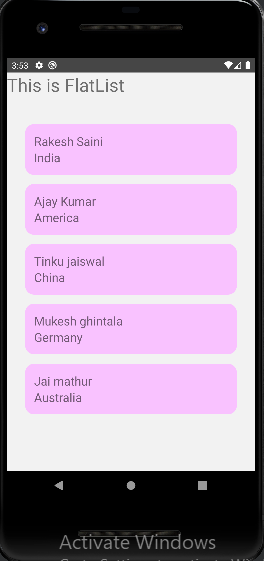
Result
Below screenshot is the result of the this tutorial. We created simple FlatList. You can design according to your use.
Explanation
list
This is the list of data which have in data in key and value format. It can be any type. You can use the list data stored from the API call like fetch in React Native.
        list: [
                { "name": "Rakesh Saini", "country": "India" },
                { "name": "Ajay Kumar", "country": "America" },
                { "name": "Tinku jaiswal", "country": "China" },
                { "name": "Mukesh ghintala", "country": "Germany" },
                { "name": "Jai mathur", "country": "Australia" },
            ],
React Native FlatList
To create FlatList in React Native use the use <FlatList /> pass the props. You can learn more about from here. Provide the props, data and renderItem. You can separately create renderItem and use here by passing the list.
                <FlatList
                        style={styles.flatList}
                        data={this.state.list}
                        renderItem={({ item }) =>
                            <View style={styles.container}>
                                    <Text style={styles.titleText}>{item.name}</Text>
                                <Text style={styles.titleText}>{item.country}</Text>
                            </View>
                        }

                        ItemSeparatorComponent={this.renderSeparator} />
Conclusion
We created FlatList in the React Native project successfully. The image shown above is the result of FlatList in React Native project. You can comment for any issue and problem in comment section.